This is more an idea then a recipe but I wanted to share. This has become my new favorite way to make popcorn. It is super easy and makes the perfect size bowl of homemade popcorn.
What you need:
Brown paper lunch sack
1/3 cup popcorn kernels
Butter
Salt
Pour kernels into brown lunch sack fold the sack edges over twice lay fold side down in the microwave and cook for 2 minutes. Then pour into a bowl and butter and salt. There you have great popcorn that's much better then store bought and cheaper.
Friday, March 8, 2013

Sunday, February 24, 2013
Navajo Fry Bread
We enjoyed making Navajo Tacos for dinner recently. I haven't made these in a long time, and I'm not sure why, because my family really loves them. Here is a good recipe for making the fry bread.
Pinch off balls of dough about the size of a golf ball. Roll out each ball on a floured surface with a rolling pin until dough is about 1/8 thick. Heat about 2 inches of oil in a deep pan to about 375 degrees. Fry dough one piece at a time until golden. Turn to cook other side. Drain on paper towels. If done correctly the fry bread will puff up with several bubbles in the dough. Makes about 6-9 pieces of fry bread.
If serving for dinner: Pile them high with toppings to make Navajo tacos. Our favorite way to eat these is with this beef recipe, beans, shredded lettuce, shredded cheese, sliced olives, diced tomatoes, sour cream, and salsa. Ground hamburger taco meat or chili is also a yummy idea!
For dessert or even a special breakfast you can slather these with honey and butter, and they are scrumptious.
- 2 cups flour
- 1 TBSP baking powder
- 1 tsp. salt
- 3/4 - 1 cup hot water
- oil for frying
Pinch off balls of dough about the size of a golf ball. Roll out each ball on a floured surface with a rolling pin until dough is about 1/8 thick. Heat about 2 inches of oil in a deep pan to about 375 degrees. Fry dough one piece at a time until golden. Turn to cook other side. Drain on paper towels. If done correctly the fry bread will puff up with several bubbles in the dough. Makes about 6-9 pieces of fry bread.
If serving for dinner: Pile them high with toppings to make Navajo tacos. Our favorite way to eat these is with this beef recipe, beans, shredded lettuce, shredded cheese, sliced olives, diced tomatoes, sour cream, and salsa. Ground hamburger taco meat or chili is also a yummy idea!
For dessert or even a special breakfast you can slather these with honey and butter, and they are scrumptious.
Friday, February 22, 2013
Berry Buttercream Frosting

But this year, I think I perfected the berry buttercream frosting. Here is the recipe that I prefer to use with this cake, though there is also another recipe option you can find at the above link.
Berry Buttercream Frosting
- 1 tsp. raspberry extract
- 1/2 tsp. butter vanilla gel (optional. You could substitute vanilla extract to taste.)
- 2-4 T. water
- 1 c. shortening
- 1 T. Wilton Meringue Powder
- 1 lb. powdered sugar
- 1/2 c. frozen berries, thawed (I used a bag of mixed berries: blueberries, raspberries, boysenberries, and strawberries. You could use any of these singly as well.)
We served this cake and the peanut butter cake below. If you ate a bite of both cakes together, it tasted just like a PB&J sandwich in cake form - ha ha ha!
Peanut Butter Cake with PB Frosting

I found the recipe here.
- 1/2 cup creamy peanut butter
- 1/2 cup butter, softened
- 4 eggs
- 1 (18.25 ounce) package yellow butter cake mix
- 2/3 cup water
- 1 cup peanut butter
- 1/2 cup butter, softened
- 4 cups confectioners' sugar
- 1/3 - 1/2 cup heavy cream (or more)
- Reeses' PB Cups (optional)
Thursday, February 21, 2013
Lemon or Orange Sugar Tea Cookies
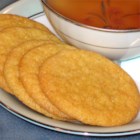 I was making cookies for some friends recently, and wanted to do something a little different than my usual standbys. I went in search of a new cookie recipe, and ended up finding this one on allrecipes.com.
 I loved how these turned out. These were just the right amount of crunchy and soft and had a very nice, light flavor! My friends loved them as well.
Ingredients:
- 3/4 cup butter
- 1 cup white sugar
- 1 egg
- 2 tablespoons corn syrup
- 1 teaspoon lemon extract (I didn't have lemon extract, so I substituted orange extract. You could probably try any kind of extract here. The orange was delicious.)
- 2 cups all-purpose flour
- 1 teaspoon baking soda
- 1 teaspoon baking powder
- 1/2 cup white sugar
Directions:
1. In a medium bowl, cream together butter and 1 cup sugar until light and fluffy. Beat in egg, corn syrup, and lemon extract. Stir in flour, baking soda, and baking powder. Cover dough, and chill in the refrigerator at least 1 hour.
2. Preheat oven to 325 degrees F (165 degrees C). Line a cookie sheet with parchment or wax paper. Roll chilled dough into walnut sized balls. Roll balls in remaining sugar, and place on the prepared cookie sheet.
3. Bake 12 minutes in the preheated oven, or until lightly browned.
Cream of "Something" Soup Recipe
I have so many recipes to post! I'll try to catch up over the next few days.
First of all, though, I must share this recipe. You have probably seen it on pinterest or blogs. I've been meaning to try this out for months, and finally made some of this mix about a month ago. This is why I think it is AWESOME!
1. It's cheap. So, it's no secret that our family is on a tight budget. In our 11 years of being married, I've never had to be so frugal with grocery shopping. And cream of whatever soups are NOT cheap. So, by making this mix, I am saving a significant amount of money over time.
2. It's healthier than the canned soup. No preservatives, crazy amounts of salt, who knows what else... just trustworthy ingredients you can probably find in your pantry.
3. It's easy. It took me five minutes to make up the mix and stick it in my pantry. Then it takes me about five minutes to create the 'can of soup' for each recipe. Easy peasy...
4. It's DELICIOUS! Surprisingly so! I have now had the chance to use it in several completely different recipes. One was a casserole that called for cream of chicken soup, another was a crock pot meal that called for cream of celery; I've used it in a sauce that wanted cream of mushroom... Every single one of these meals has turned out absolutely delicious! I won't say that this recipe tastes exactly like a can of cream soup, but I am willing to bet that your family won't be able to tell the difference. And honestly, I feel that the flavor was enhanced in my few experiences.

Are you convinced? Here's the recipe:
- 1 cup non-fat dried milk
- 3/4 cup cornstarch
- 1/4 cup bouillon powder (If you have cubes you have to smash them up. You can use whatever kind you like, such as chicken, beef, or veggie. The only kind I had enough of was beef, so that is what I used. Next time I plan to try chicken.)
- 4 Tablespoons freeze dried minced onions (I didn't have any, so I used some onion salt instead)
- 1 teaspoon dried basil
- 1 teaspoon dried thyme (You could use dried parsley instead.)
- 1 teaspoon pepper
Mix everything together well and store in an air tight container. I keep mine in the pantry with the instructions below on it:
When you need a can of cream of soup, mix 1/3 cup dry mix with 1 1/4 cup water. Cook over medium or medium high heat, stirring, until thick. It will look like the same consistency of the soup when it comes out of the can.
Voila!
Monday, February 11, 2013
Chocolate and Strawberry Cupcakes
Nothing says "Valentine's Day" more than chocolate and strawberries, and these cupcakes from Tidy Mom are absolutely to DIE for. I know Melissa especially is a huge fan of chocolate covered strawberries, but everybody needs to try these ASAP!


Ingredients
- 1 Duncan Hines Moist Deluxe Dark Chocolate Fudge Cake Mix
- 3 Large Eggs
- 1/2 cup melted butter (butter not margarine)
- 1 cup water
- 1 cup heavy whipping cream
- 1/3 cup sugar
- 1 tsp vanilla
- 5-6 T. chopped/processed strawberries
- ½ cup butter, at room temperature
- 8 oz. cream cheese, at room temperature
- 1 teaspoon vanilla
- ½ cup unsweetened cocoa
- 4 cups powdered confectioners sugar
- 1-4 Tablespoons heavy whipping cream
Chocolate Fudge Cupcake
Strawberry Whipped Cream (filling)
Chocolate Cream Cheese Frosting (from Glorious Treats)
Instructions
- Preheat oven to 350
- Mix on low until blended, then mix on high for 2 mins.
- Pour into paper lined cupcake pans.
- Bake for 20 min.
- Chop strawberries in blender (I used my Magic Bullet) just until they look thick and “liquidy”. I used really large strawberries and it took 4 to make 5-6 Tablespoons.
- Beat whipping cream, and vanilla until it starts to thicken.
- Mix in sugar.
- Fold in strawberries.
- *Place butter in a large mixing bowl and blend slightly. Add cream cheese and blend until combined, about 30 seconds.
- *Add the cocoa powder( before adding the sugar, so it gets fully incorporated into the butter and cream cheese.)
- *Add vanilla extract and powdered sugar and blend on low speed until combined. Increase to medium speed and beat until it begins to get fluffy.
- *Slowly add the heavy cream, a little bit at a time until desired consistency is met. (Don’t add too much if you want the frosting to stay in place when piped on cupcakes.)
- *Beat until fluffy, about 1 minute.
- *Use at once or keep refrigerated. (This frosting will keep well in the refrigerator for several days, but you may need to re-beat it for the best texture.)
- Bake cupcakes and cool completely
- Cut out a small section in the center of the cupcake (save in bowl)
- add strawberry whipped cream to the hole
- replace the tops (just do the best you can – or you could just leave them off)
- pipe chocolate frosting on top of cupcake with 1M tip.
Chocolate Fudge Cupcake
Strawberry Whipped Cream (filling)
Chocolate Cream Cheese Frosting
Subscribe to:
Posts (Atom)