Thursday, January 24, 2013

Caramel popcorn


We tried this from pinterest click here if you want the original recipe.  It was really good and the caramel stayed gooey which is a must for me. This stuff is the BOMB!! Soft Caramel for Popcorn:
1c brown sugar,
1 stick butter,
1c karo syrup,
1 can sweetened condensed milk.
heat everything up until sugar is dissolved and it starts to bubble. This makes a lot of caramel so either half it or make a big big batch of popcorn.


Teriyaki Chicken


 This was found off of pinterest. click here for the original recipe. lakelurecottagekitchen.com.
CROCK POT TERIYAKI CHICKEN
12 boneless skinless chicken thighs (about 3 pounds)
 3/4 cup sugar
3/4 cup low-sodium soy sauce
 6 tablespoons cider vinegar
 3/4 teaspoon ground ginger
3/4 teaspoon minced garlic
1/4 teaspoon pepper
 4 1/2 teaspoons cornstarch
4 1/2 teaspoons cold water
 Hot cooked long grain rice
Place chicken in a 4 qt. slow cooker. In a large bowl, combine the sugar, soy sauce, cider vinegar, ginger, garlic and pepper. Pour over chicken. Cover and cook on low for 4 to 5 hours or until chicken is tender. Remove chicken to a serving platter; keep warm. Skim fat from cooking liquid. Place liquid in a saucepan and bring to a boil. Combine cornstarch and water until smooth. Gradually stir into liquid and stir until sauce is thickend. Serve with chicken and rice. Note: I halved the recipe and it still worked fine in my crock pot. It might not need the full 4 hours time. 

Cake batter ice cream

I got an awesome cuisinart ice cream maker recently and so we have been trying out new recipies. This  was found off of pinterest and was a hit with everyone. This is from fatgirltrappedinaskinnybody.com you can go to the website here.
 Ingredients 
1 cup heavy cream, 
1 cup milk (I used 1%)
1 cup half and half
2/3 cup cake mix white or yellow
 3/4 cup sugar
 1 tsp vanilla extract
Pinch of salt
3 egg yolks
 2 tbsp sprinkles (I used nonpareils)
 Directions In a medium saucepan, combine 1 cup of the heavy cream with the cake mix, sugar, and salt. Heat over medium heat until warmed through. Meanwhile, place the egg yolks in a medium bowl and whisk until smooth. Combine the milk and half and half, and vanilla in a large mixing bowl with a fine mesh sieve set over the top. When the mixture in the saucepan is warm (not boiling, but almost), slowly pour a small amount into the bowl with the egg yolks to temper them, whisking constantly. Continue pouring the cream mixture in a steady stream, whisking continuously until completely combined. Return the mixture to the saucepan over medium heat. Continue heating, stirring and scraping the bottom of the pan, until the mixture thickens slightly coats the back of a wooden spoon. Immediately pour the custard mixture through the mesh sieve into the bowl with the remaining milk mixture and mix to blend. Cover and chill the mixture thoroughly in the refrigerator (I chilled it overnight). Once the mixture is chilled, freeze in an ice cream maker according to the manufacturer’s instructions. Store in an airtight container in the freezer. Sometimes my homemade ice cream gets a little too hard when it freezes after I churn it. This one didn’t. It stay perfectly soft and scoop able, I was very pleased!

Chicken and Dumpling Casserole

I have been trying to test out the recipes that I have pinned on pinterest and here is one that was a hit.


Quick and easy my favorite. This recipe is from Plain Chicken click here.

Chicken and Dumpling Casserole
  • 3-4 cups of cooked chicken (I use a rotisserie chicken) 
  • 2 cups chicken broth 
  • 1/4 cup unsalted butter 
  • 1 cup flour 
  • 1 1/4 tsp baking powder 
  • 1/4 tsp salt 
  • 1 cup milk 
  • 1 can Campbell's cream of chicken soup 
Preheat oven to 400. Melt butter in the microwave and pour into bottom of a 9x13 pan. Shred the chicken and spread it on top of the butter. Whisk together the milk and the flour, baking powder and salt. Slowly pour over the chicken. Don't stir. Whisk together chicken broth and cream of chicken soup. Pour soup over the flour and milk mixture. Don't stir. Bake uncovered for 35 to 45 minutes, or until dumplings are golden brown.

Wednesday, January 23, 2013

Homemade Granola

I really like granola.  I love it in my yogurt, sometimes with milk, or just plain.  But the brands I tend to like can be EXPENSIVE.  So, I've been looking for a really good granola recipe to make at home.  And I think I found one I'll stick with!

This recipe if from the book Worldwide World Christmas Cookbook, which my sis-in-law gave me for Christmas a few years back.  The recipe was submitted by Jenna Smith from South Carolina.
  • 10 C. regular oatmeal
  • 2 c. almonds, slivered or sliced (today I used chopped pecans, and they are delicious, too!  Use whatever nut you prefer.)
  • 2 c. coconut (note to all you coconut haters: you can't see the coconut in the end or feel it's texture.  It just adds very subtly to the flavor.  Even if you think you don't like coconut, I highly recommend you leave this in.  Katelee hates coconut, but has no idea it's in this granola, which she loves!)
  • 2 C. packed brown sugar
 Mix these together in a large bowl.  Meanwhile, in a medium saucepan, heat:
  •  3/4 c. oil
  • 1/2 c. peanut butter
  • 3/4 c. honey
  • 3/4 c. water
  • 2 tsp. vanilla
Heat and stir until the peanut butter is completely melted.  Pour over the dry ingredients and mix well.  Spread onto two large cookie sheets.  Bake at 250 degrees for 45 minutes, stirring once during baking.  Let cool.  After it's completely cooled, stir in
  •  assorted dried fruit (I really like Craisins.  Other good ideas would be dried apricots, raisins, berries of any kind, etc.)
Serve with milk or yogurt, or even enjoy plain.  Makes about 16 cups. Put in an airtight container, and this would last for several months.


Sunday, January 20, 2013

Grandma Kaye's Chewy Brownies (Blackies!)

We were at Grandma Kaye's house last week, and she served us the most delicious brownies!  We made them ourselves tonight for our Family Home Evening treat, and they were still awesome.  I never seem to have a brownie mix on hand, and I love that I can whip these up from ingredients that are always in my pantry/fridge.  This is a recipe that is definitely worth sharing:

  • 1 stick butter, melted
  • 1 c. sugar
  • 1 tsp. vanilla
  • 2 eggs
  • 1 c. flour
  • 3 HEAPING T. baking cocoa (Grandma likes them more like 'blackies' than 'blondies'  :)
  • chocolate chips, if desired (optional)
Mix all the ingredients well.  Pour the batter into a greased 8x8 pan.  Bake at 325 degrees for 20 minutes or until set.  (I think I had to bake mine for 22 minutes.)

Serve warm or cooled!

Baked Penne Casserole

If you are looking for a truly crowd-pleasing, family-friendly dinner that is easy and delicious, look no further!  I found this recipe on pinterest.  It's done by The Country Cook, and after I read through the recipe, I knew I had to try it.  My family GOBBLED this up.  I seriously don't think Katelee or Blake have ever eaten so much in their lives.  And Gerald and I loved it too!  A great dinner to please kids and adults!


Ingredients:
  • 1/2 - 1 lb. ground beef 
  • 1/2 cup onions, diced 
  • 1/2 cup green peppers, diced (I left these out, as the sight of green peppers is enough to make Katelee refuse to even try it...)
  • 1 jar (24 oz.) spaghetti sauce 
  • 1 tub (10 oz.) Philadelphia Italian Cheese and Herb Cooking Creme, divided (I used Light.)
  • 1 cup Kraft shredded Mozzarella Cheese, divided 
  • 3 cups cooked penne pasta (about 1 3/4 c. dry)

If you haven't already cooked your pasta, do so first. You'll need to bring water to a boil and then add in about 1 3/4 cups uncooked pasta (this should give you about 3 cups cooked since pasta nearly doubles in size after cooked). I always throw a little extra in for good measure.
When pasta is cooked al dente, make sure you drain excess water thoroughly.  Be careful not to overcook, as you will be baking the pasta as well and don't want it to come out soggy.

Preheat oven to 350F degrees. Spray a 2-quart casserole dish (or 9x9 baking dish) with nonstick cooking spray.

Begin browning and crumbling ground beef with onions and green peppers (if using).
You'll need to do this in a large skillet because you'll be adding in your sauce and pasta to it later.

Once beef is browned, drain any excess grease.  Stir in spaghetti sauce, 3/4 cup cooking creme and 1/2 cup mozzarella.

Cook and stir 2-3 minutes or until mozzarella is melted. Add pasta and mix lightly.
Spoon mixture into your prepared baking dish. Top with remaining cooking creme. Then sprinkle with remaining mozzarella cheese.

Cover with lid or aluminum foil.  When using aluminum foil, I like to spray the inside of the foil with nonstick spray so the cheese doesn't stick to it while baking.

Bake for 15 minutes. Then uncover and bake for an additional 5 minutes so the cheese can get nice and melted and bubbly.
 
Serve warm, maybe with a green salad and some Tuscan bread on the side.  Enjoy!

Chicken and Dumplings

Have you ever had chicken and dumplings?  I hadn't and wasn't sure if I would like it or not.  But I had all the ingredients on hand, and it sounded like a good meal for a cold day, so we gave it a try.


Delicious!  I learned that I LOVE chicken and dumplings!  This was easy, nourishing, creamy, warm and soooo yummy.  And I love that it is made from ingredients that I generally have on hand.  We all loved it!

This recipe is from Our Best Bites' cookbook.

  • 6 cups chicken broth (1 1/2 boxes or 3 cans) OR (I didn't' have broth on hand) 6 c. water + 6 chicken bouillon cubes 
  • 1 lb. cooked chicken, cut into bite-sized pieces (you could use 1/2 of a fauxtisserie chicken and it’s FABULOUS! You could also use leftover rotisserie chicken from the grocery store) 
  • 1 c. sliced carrots 
  • 2 ribs celery, chopped 
  • 1 onion, minced 
  • 2-3 cloves garlic, minced or pressed 
  • 1 bay leaf 
  • 1 handful of chopped fresh parsley OR 1 Tbsp. dried parsley
  • 1/2 tsp. basil 
  • 1 14-oz. can evaporated milk (fat free is fine) 
  • 1 recipe of Bisquik dumplings (recipe is on the box) 
  • 1 T. olive oil
If using uncooked chicken, cook your chicken.

Meanwhile, in a large pot, heat some olive oil over medium heat and add onions and garlic. Saute for a few minutes and then add chicken broth (OR water and buillion like I did), cooked chicken, bay leaf, and basil. Bring to a boil. Add carrots and celery and reduce heat to a simmer. Cover and cook until carrots and celery are tender. While this is cooking, prepare the Bisquik dumpling batter, as instructed on the box.  When carrots and celery are almost done, add chopped parsley. Add evaporated milk. Increase heat to boiling add prepared Bisquik by small spoonfuls (they’ll really puff up while they’re cooking). Cook until dumplings are cooked through (they should appear moist but feel firm; this is after about 4-5 minutes).

One other thing–if you know you’ll have leftovers, only add dumplings to what you know you’ll eat immediately. The dumplings will soak up all the liquid in the soup when you store it as leftovers, so you’ll have overly-mushy dumplings and chicken with no broth if you don’t. The other thing you can do is add all of the dumplings or all of the noodles, and then store the dumplings or noodles separately from the rest of the soup. That’s easy to do with dumplings, not so much with noodles. Serves 5-6-ish…

Tuesday, January 15, 2013

Candied Carrots

I am getting tired of the same old ways I serve veggies at dinner.  We seem to alternate between green salad and frozen peas or corn.  The other night I was making stroganoff and muffins for a dinner, and had time to try something new for a vegetable side dish.  I found this recipe at allrecipes.com, and decided to give it a try.  It was a hit!  So easy, yummy, and my kids absolutely loved these.  We will definitely be making candied carrots often in the future!

"Sliced carrots are glazed in a buttery brown sugar sauce for a colorful, crowd-pleasing side dish."

Ingredients:
  • 1 pound carrots, cut into 2 inch pieces (I used 1 lb. baby carrots - no cutting required!)
  • 2 tablespoons butter, diced 
  • 1/4 cup packed brown sugar 
  • 1 pinch salt 
  • 1 pinch ground black pepper 
Directions:

Place carrots in a pot of salted water. Bring water to a boil, reduce heat to a high simmer and cook about 20 to 30 minutes. Do not cook the carrots to a mushy stage!  Drain the carrots, reduce the heat to its lowest possible setting and return the carrots to the pan. Stir in butter, brown sugar, salt and pepper. Cook for about 3 to 5 minutes, until sugar is bubbly. Serve hot!

Monday, January 14, 2013

Sunday Beef Stew

This is the beef stew recipe that I made with the corn bread I posted last week.  It is from Our Best Bites and is a truly delicious beef stew.  And like most stews, it's super easy!  Perfect for a cold winter's day.
  •  1 1/2-2 lb. lean stew beef, cut into even smaller bite-sized pieces (just pull out a pair of kitchen shears and cut anything that looks like you’d need to use a knife and fork on) 
  • 4-5 medium red potatoes, chopped 
  • 4-5 medium carrots, peeled and chopped 
  • 4 stalks celery, chopped 
  • 2 cups roughly chopped onions, one large or 2 small 
  • 4-5 cloves garlic, minced 
  • 2 12-oz. cans or 3 c. vegetable juice cocktail (like V8 or even Bloody Mary mix) 
  • 1 10-oz. can condensed tomato soup 
  • 10 oz. water (just use the can from the tomato soup to measure) 
  • 1 tsp. basil 
  • 2 beef bouillon cubes (or 2 tsp. beef base) 
  • 1/2 tsp. freshly ground black pepper 
Combine all ingredients in a large dutch oven or other oven save dish with a tight fitting lid. Cook for about 3 hours at 350 degrees. OR, place in a slow cooker and cook on low for 9-10 hours or high for 5-6.

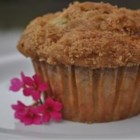
Banana Crumb Muffins

I've been looking for a truly spectacular banana muffin.  I love to make muffins and freeze them for yummy and easy breakfasts on busy mornings.  This is the best banana muffin recipe I have tried!  The streusel topping make these divine.  :)
  • 1 1/2 cups all-purpose flour 
  • 1 teaspoon baking soda 
  • 1 teaspoon baking powder 
  • 1/2 teaspoon salt 
  • 3 bananas, mashed 
  • 3/4 cup white sugar 
  • 1 egg, lightly beaten 
  • 1/3 cup butter, melted 
  • 1/3 cup packed brown sugar 
  • 2 tablespoons all-purpose flour 
  • 1/8 teaspoon ground cinnamon 
  • 1 tablespoon butter 
Directions:
1. Preheat oven to 375 degrees F (190 degrees C). Lightly grease 12 muffin cups, or line with muffin papers.

2. In a large bowl, mix together 1 1/2 cups flour, baking soda, baking powder and salt. In another bowl, beat together bananas, sugar, egg and melted butter. Stir the banana mixture into the flour mixture just until moistened. Spoon batter into prepared muffin cups.

3. In a small bowl, mix together brown sugar, 2 tablespoons flour and cinnamon. Cut in 1 tablespoon butter until mixture resembles coarse cornmeal. Sprinkle topping over muffins.

4. Bake in preheated oven for 18 to 20 minutes, until a toothpick inserted into center of a muffin comes out clean.

recipe image

Thursday, January 10, 2013

Yummy Cornbread

We are having a snowstorm tonight, so I decided to make beef stew for dinner.  And then I found myself inexplicably craving some moist cornbread to go along with it.  I don't generally like cornbread, but I am outnumbered because the rest of my family LOVE it.  I ended up combining what I thought were the best things from two different recipes, and I was really happy with the results.  My little family ate them all up, no leftovers!  (Although Blake did have a considerable amount of crumbs under his chair.)  :)  We served it with Honey Butter, and it was truly scrumptious.  These would also make great muffins!
  • 1-2 T. shortening
  • 1 cup all-purpose flour
  • 1 cup cornmeal
  • 1/4 cup white sugar
  • 1/2 tsp baking powder
  • 1/2 tsp baking soda
  • 1/2 tsp salt
  • 1 egg, lightly beaten
  • 1 cup sour cream
  • 1/3 c. milk OR buttermilk
  • 1/4 c. butter, melted
Preheat the oven to 400 degrees.  Place 1-2 T. shortening into an 8x8 baking dish, and place the dish into the oven to get hot and let the shortening melt.

In a large bowl, combine all the dry ingredients and stir well.  (flour, cornmeal, sugar, baking powder, baking soda, and salt.)

In a smaller bowl, mix all the wet ingredients until well combined.  (egg, sour cream, milk, and melted butter.)

Fold egg mixture into flour mixture until JUST moistened.  The batter will be thick.

Remove the baking dish from the oven.  The shortening should be melted and thoroughly coating the bottom of the dish, and the dish should be nice and hot.  Pouring the batter in now will give the crust and edges that nice crispy fried texture.  Pour the batter into the dish and spread until flat.

Bake in preheated oven until a toothpick inserted near the center comes out clean, about 20 - 25 minutes.  Serve warm.

Wednesday, January 9, 2013

Flour Tortillas

I had to get a little more creative than usual cooking dinner last night.  We still hadn't had a chance to get to the store since our trip to Flagstaff and the pantry was pretty bare.  I decided Chicken Ranch tacos sounded delicious, but we didn't have any tortillas in the house.  So I decided to be brave and make my own.  Has everyone done this but me?  Because they were surprisingly easy!  And tasted sooooooooooooo much better than the stale store-bought kind.  Seriously, we many never go back!  If you haven't tried homemade tortillas, I suggest you do!  You're welcome.  :)

I used Our Best Bites recipe.  You can click that link for the full tutorial, if wanted.  The rest of this post is quoted directly from their website:
_________

I tried a couple of times to make my own tortillas, but I always failed–they were always too thick because the dough was so tough that I wasn’t physically strong enough to roll them to the size and thickness and shape that I actually wanted them. And then I met Mel–Fabulous Fajita Mel–and I learned from her how to make my own gen-u-ine flour tortillas. And it’s really not THAT much work. Plus, the results are SO worth any extra effort it might take! I promise you, once you make these, you will never return to store-bought tortillas in good conscience.

Flour Tortillas
  • 2 1/2 c. flour
  • 1 c. very hot water
  • 1 tsp. Kosher salt
  • 1/4 c. shortening


In a heavy-duty mixer, combine flour and salt. Add in shortening and mix until well combined (it will resemble coarse bread crumbs). (Jenn's note: I did it by hand.  Combined the flour and salt in a large bowl and then added the shortening in with a pastry blender or two knives.)  Add hot water. The water hotness is the key to these being easy to make–it needs to be hot enough to melt the shortening, but not SO hot that the dough turns into an ooey-gooey mess. Or a hot mess (literally), as Mia Michaels might say. I usually get relatively warm water from my tap and then heat it for 45-60 seconds in the microwave.

Anyway, after you add the water, the dough will start to come together. When it is fully combined, remove from mixer and divide into portions. Now…the recipe yield really depends on how many tortillas you want. If you want small tortillas (like for fajitas), then you’ll probably get around 10-12. If you want medium tortillas (burritos), then you’ll probably get 8 or so. For large tortillas (like for salad wraps), you’ll get around 6. Shape portions into round balls.

Preheat a non-stick or cast-iron skillet to medium heat. If necessary, spray your work surface with non-stick cooking spray; you may not need to because the dough isn’t particularly sticky, but it may be and you also don’t want to add any more flour to your dough. Press your palm against the surface of the dough ball, trying to maintain as much of a round shape as possible. Place rolling pin in middle of flattened dough ball and roll to desired thickness, shaping in a circle as you go.

Place raw tortilla on preheated skillet.  You’re going to be watching for bubbles. If you get little blistery bubbles, your skillet is too hot and you need to reduce the heat. You’re looking for big, fat, slow-bubbling bubbles.  When you start to see them, flip the tortilla over and cook for another 30-45 seconds or so.

This is where some personal taste comes in, but in my experience, dark marks on your tortillas (like you see on store-bought ones) usually lead to brittle tortillas when they cool down. Personally, I’m keeping my eye out for a kind of “greasy” look inside; I know that sounds gross, but that’s the best way I can think of to describe it. These ones are cooked enough to not taste raw, but they’re also very soft when they cool and they hold up to being wrapped, folded, twisted, and turned.

If you’re cooking these quickly, you can just stack them on top of each other and they’ll stay warm. You can also wrap them in damp paper towels and then wrap them in foil and keep them in a warm oven (170) until you’re ready to use them. But be sure and save one just for you–you have to eat it while it’s still hot and you can spread some butter on it or butter with cinnamon sugar or just eat it plain and BLESS the wonder that is real Mexican food!

Wednesday, January 2, 2013

Egg & Hash Brown Breakfast Casserole

We had a delicious Christmas morning breakfast this year, and the best part of it is that I didn't have to do anything Christmas morning other than bake the already made casseroles.  We served the Overnight Caramel French Toast with this egg casserole, and they were both scrumptious, easy, and complimented each other well.  This recipe is definitely a keeper that we will use all year round!  

Ingredients:
  • 1 lb. package frozen hash brown potatoes, thawed 
  • 1 pound pork sausage 
  • 1/2 small onion, diced 
  • 5 eggs 
  • 1/4 cup milk 
  • 1/4 teaspoon onion powder 
  • salt and ground black pepper to taste 
  • 6 ounces shredded Cheddar cheese 
Directions:

1. Preheat oven to 350 degrees F (175 degrees C). Grease a 2 quart baking dish. Place the hash brown potatoes in the bottom of the baking dish.

2. Heat a skillet over medium heat and cook and stir the sausage and onion until the sausage is crumbly, evenly browned, and no longer pink; drain. Meanwhile, whisk together the eggs, milk, onion powder, salt, and pepper, and pour over the potatoes. Layer with half the Cheddar cheese, the sausage mixture, and the remaining Cheddar cheese. Cover with aluminum foil. If making the night before, refrigerate now until morning.

3. Bake, covered with the tinfoil, in the preheated oven for 45 minutes - 1 hour. Remove foil cover; return casserole to the oven and bake until a knife inserted into the center comes out clean, about 10 minutes. Let stand for 5 minutes before serving.